A Honeywell home thermostat is a smart choice for homeowners looking to upgrade their home’s heating and cooling systems. These thermostats are designed to improve comfort, energy efficiency, and control over your home’s climate. In this guide, we’ll explore the various features, benefits, and options available with Honeywell thermostats to help you make an informed decision about your home’s temperature management.
What is a Honeywell Home Thermostat?
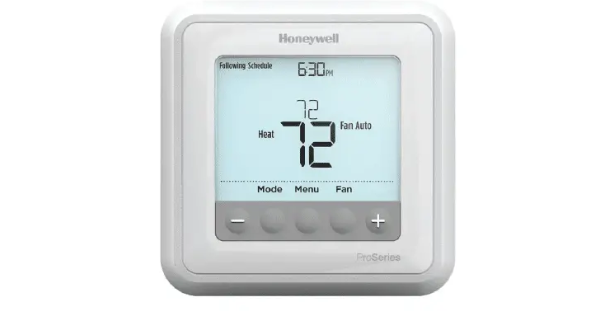
Honeywell home thermostats are advanced devices that help homeowners regulate their heating and cooling systems efficiently. With the ability to control temperature settings, monitor energy usage, and adjust schedules remotely, these thermostats offer both convenience and savings. Whether you’re upgrading from a traditional manual thermostat or transitioning to a smart home system, a Honeywell thermostat is a solid choice.
Types of Honeywell Thermostats
Honeywell offers a variety of thermostats, each designed to meet specific needs. Let’s look at the most popular types:
1. Programmable Thermostats
A programmable Honeywell thermostat allows you to set a schedule for your heating and cooling, helping you save energy by adjusting the temperature when you’re not home. You can program it to cool or heat your home to your desired temperature before you arrive, ensuring comfort and efficiency.
2. Smart Thermostats
A smart Honeywell thermostat connects to your Wi-Fi network and allows you to control it via an app on your smartphone or tablet. This provides remote access to your home’s temperature, enabling you to adjust settings from anywhere. Many smart thermostats also integrate with voice assistants like Amazon Alexa and Google Assistant.
3. Non-Programmable Thermostats
For those who prefer simplicity, non-programmable Honeywell thermostats are easy to use and provide manual control over temperature. These are ideal for individuals who don’t need complex scheduling features but still want a reliable thermostat.
4. Wi-Fi Thermostats
Wi-Fi Honeywell thermostats offer connectivity options similar to smart thermostats but focus more on providing seamless integration with home networks. You can control these thermostats from any internet-connected device, making it easy to manage your home’s temperature while traveling or away.
Benefits of a Honeywell Home Thermostat
1. Energy Efficiency
One of the top reasons homeowners choose Honeywell home thermostats is the potential for energy savings. By using features like programming, scheduling, and remote access, you can reduce heating and cooling costs. Smart thermostats, in particular, learn your habits over time and adjust the temperature based on your preferences, ensuring that no energy is wasted.
2. Convenience and Control
A Honeywell home thermostat offers ease of use with intuitive interfaces and remote control capabilities. With smart thermostats, you can adjust your home’s temperature from anywhere, whether you’re at work or on vacation. No more coming home to a hot or cold house; just set the temperature in advance and walk into a comfortable home.
3. Smart Integration
Many Honeywell thermostats integrate seamlessly with other smart home devices. Whether you use Amazon Alexa, Google Assistant, or Apple HomeKit, these thermostats work with your existing smart home setup. You can use voice commands or automation to control your thermostat, making it an integral part of your smart home ecosystem.
4. User-Friendly Interface
Honeywell thermostats are known for their simple, easy-to-navigate interfaces. Whether you choose a touchscreen model or one with a classic dial, these thermostats are designed to be intuitive. Even those who aren’t tech-savvy can easily operate them, making them suitable for all ages.
How to Install a Honeywell Home Thermostat
Installing a Honeywell home thermostat is a straightforward process that can typically be done in a few simple steps:
1. Turn Off Power
Before beginning, turn off the power to your HVAC system to avoid electrical hazards.
2. Remove the Old Thermostat
Carefully remove the cover of your old thermostat and disconnect the wires. Take note of the wiring labels to ensure proper connections with your new thermostat.
3. Connect the New Thermostat
Attach the wires to the new Honeywell thermostat according to the wiring guide provided. Follow the instructions carefully to avoid incorrect wiring, which can cause the thermostat to malfunction.
4. Mount the Thermostat
Once the wires are connected, mount the thermostat on the wall and secure it in place.
5. Power On and Set Up
Turn the power back on, and your new thermostat will guide you through the setup process. For smart models, you’ll need to connect the thermostat to your Wi-Fi and download the app to control it remotely.
How to Program a Honeywell Home Thermostat
Programming your Honeywell home thermostat allows you to automate your home’s temperature settings based on your schedule. Here’s how to set it up:
1. Select Your Schedule
Set the temperature for different times of the day, such as when you wake up, leave for work, and go to bed. Honeywell thermostats allow you to set different temperatures for each day of the week, so you can customize the schedule to fit your lifestyle.
2. Adjust Temperature Settings
Ensure the temperature is set to your desired levels for each part of the day. The thermostat will adjust automatically according to your programming, helping you save energy while keeping your home comfortable.
3. Review and Finalize
After setting your schedule, review it to ensure everything is correct. Once confirmed, the thermostat will automatically follow your instructions without needing manual adjustments.
Honeywell Home Thermostat Troubleshooting
While Honeywell thermostats are reliable, you may encounter issues from time to time. Here are some common problems and solutions:
1. Thermostat Not Turning On
Check if the thermostat is properly connected to the power source. Ensure that the circuit breaker is not tripped. If you’re using a smart thermostat, verify that the Wi-Fi connection is stable.
2. Incorrect Temperature Readings
If the thermostat is displaying an incorrect temperature, check if the sensor is working properly. Clean the thermostat’s sensor, and if the issue persists, reset the device to its factory settings.
3. Heating or Cooling Not Working
If the system isn’t responding to your temperature settings, ensure that the HVAC system is powered on and that all wiring connections are secure. You may need to consult a professional if the problem continues.
Conclusion
In summary, a Honeywell home thermostat offers excellent features for homeowners looking to optimize their heating and cooling systems. With energy-saving capabilities, smart features, and ease of use, it’s a worthwhile investment for those looking to improve their home’s comfort and efficiency. Whether you choose a programmable or smart model, Honeywell thermostats are a reliable choice for any home.
FAQs
1. How do I connect my Honeywell thermostat to Wi-Fi?
To connect your Honeywell thermostat to Wi-Fi, go to the settings menu, select Wi-Fi settings, and follow the on-screen instructions to connect to your home network. Make sure you have your Wi-Fi password ready.
2. Can I control my Honeywell thermostat remotely?
Yes, if you have a Honeywell smart thermostat, you can control it remotely using the Honeywell Home app on your smartphone or tablet.
3. How do I reset my Honeywell thermostat?
To reset your Honeywell thermostat, press and hold the reset button for 5-10 seconds, or follow the specific reset instructions in your model’s user manual.
4. Why is my Honeywell thermostat not cooling or heating properly?
This could be due to issues with the wiring, a power failure, or settings not being configured correctly. Double-check the connections and settings, and if the problem persists, consult a technician.
5. What is the lifespan of a Honeywell thermostat?
A Honeywell thermostat typically lasts around 10 years, depending on usage and maintenance. If it begins to malfunction, it may be time to replace it with a new model.